
Constructing a Gaming PC: Breaking Down the Process Steps
Revamped Guide to Building a Gaming PC
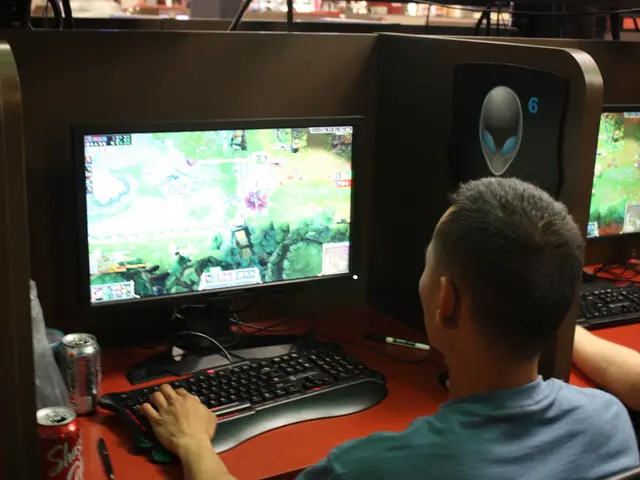
Ready to unleash the beast? Dive into the exciting world of custom gaming PCs and conquer your gaming challenges with a powerful rig! Let's get started with the tools, workspace, and components you'll need for your ultimate gaming setup, courtesy of the experts at e1search.
The Arsenal: Essential Tools and Preparations for Building a Gaming PC
Building a gaming PC is like solving a big puzzle. To put the pieces together, you need the right tools. Let's first examine the tools you'll need for the task:
*Phillips #2 Screwdriver:** This versatile tool will handle almost every screw in your PC build.
Small Pliers or Tweezers: These can help with those stubborn parts like securing cable ties.
Flashlight or Headlamp: Brighten up those dark, tricky areas inside your PC.
Anti-Static Wrist Strap: Nail down the importance of static protection.
Zip Ties or Velcro Straps: Keep cable management under control with these organizers.
Soft Cloth: Wipe down dust and fingerprints easily from parts.
Prep Time: Setting Up Your Workspace Like a Pro
The next step? Prepare your workspace for the build ahead. Follow these tips:
Find a suitable space: Choose a clean and flat surface free of food and drinks to work on. A large table or desktop will suffice.
Awesome lighting: Choose a well-lit location with bright lights for a more efficient build.
Going Static-Free: Minimize the risk of static electricity by selecting a workspace with a hard floor (avoid carpeted areas).
Fight Dress Code: Opt for short-sleeved shirts or roll up your sleeves to reduce the static buildup when moving parts around.
Organization: Lay out all the tools and parts neatly for easy access during assembly.
Compatibility’s the Key: Choosing PC Parts That Play Nice
Ensure components match perfectly to avoid headaches during the build process. To ensure compatibility, keep the following points in mind:
Match the CPU socket: Verify that the CPU fits the socket on the motherboard.
Compatible RAM slots: Check the motherboard's supported RAM types, such as DDR4 or DDR3, and size.
GPU Fits: Confirm your GPU will fit in your case with adequate space for proper airflow.
Check PSU wattage: Ensure your PSU provides sufficient power for all connected components.
Let's Dissect the Motherboard: Factors to Consider
The motherboard connects and interfaces with the majority of components in your gaming PC. Keep these features in mind when choosing a motherboard:
- Form Factor: Decide on the size. Common choices include ATX, microATX, and Mini-ITX.
- Chipset: Check for compatibility with your CPU and preferably one that supports overclocking or multiple GPUs.
- Future-Proofing: Choose a motherboard with extra slots for RAM, upgrading the CPU, or adding additional GPUs.
- Connectivity: Ensure there are enough USB ports, audio ports, and HDMI or DisplayPort for your requirements.
- Brand and Support: Opt for reputable manufacturers for better support and reliability.
Did we miss something? Check out this [motherboard overview] for more in-depth insights.
Get Ready to Build Like a Pro: Assembly Step-by-Step
Ready to begin? Let's go!
- Build Setup: Create a clear work area with adequate lighting, a static-free surface, and all necessary tools.
- Open the case: Remove covers and plastic covers from inside the PC case (if applicable).
- Prepare the motherboard: Remove the I/O shield if attached to the motherboard and install it onto the back of the case. Remove any protective stickers from the motherboard itself.
- Install the CPU: Open the CPU socket cover on the motherboard and gently insert the CPU. Align the marks on the CPU and socket when inserting. Latch the cover closed. Avoid damaging delicate pins by exerting too much force.
- Thermal Paste Application**: Apply a small amount of thermal paste on the center of the CPU for efficient heat dissipation.
- Secure the CPU cooler: Attach your cooler (CPU air cooler or AIO liquid cooler) over the CPU and secure with screws provided with the cooler. Tighten screws evenly without overtightening for best performance.
- Connect the CPU fan: Attach the fan connectors to the motherboard.
- Install the RAM: Secure the RAM sticks into their respective slots on the motherboard (usually along the left and right edges). Ensure proper orientation by looking for notches on the RAM and the motherboard slots. Screw the protective covers in place.
- Install the graphics card: Slide the graphics card into the corresponding PCIe slot. Secure it with the screws provided (if applicable).
- Connect storage drives**: Attach cables from the motherboard, SATA power cables, and data cables to SSDs or HDDs inside the case. Connect M.2 SSDs directly to the motherboard (if applicable).
- Connect the PSU: Connect the 24-pin power connector, CPU power connector, individual GPU power connectors (if applicable), and SATA power connectors to their respective parts.
- Cable Management: Route and secure cables throughout the case for optimal airflow and aesthetics.
- Install the motherboard: Ground yourself to a metal surface and insert the motherboard into the case, ensuring the screw holes match with the case standoffs. Secure the motherboard with screws provided with the case.
- Connect internal cables: Connect internal case connector cables (such as the front panel, internal HD audio, SATA power, and system fan cables) to the appropriate headers on the motherboard.
- Install optical drives: Position optical drives (such as CD/DVD/Blu-ray drives) or external drives (SSDs, HDDs, etc.) into the case.
- Connect external peripherals (optional): Connect monitors, keyboards, mice, and headsets to the motherboard.
- Power Up: Plug the power cord into the PSU, connect the power switch, and power on the PC to test its functionality before closing the case.
- Secure the case: Install the side panels and screw them into place.
Well done! You've assembled your own gaming powerhouse.
Taking Your PC to the Next Level: Performance Optimization
Now that your gaming PC is built, let's enhance its performance for a smoother and more enjoyable gaming experience. Here are a few tips to help:
Performance Benchmarking: Use software like 3DMark or Superposition to check your PC's performance. Compare your results to the recommended specifications of your favorite games to stay ahead of the curve.
Cool Air Flows: Ensure your PC has adequate ventilation with good airflow. Monitor CPU and GPU temperatures regularly to prevent overheating. Consider upgrading the CPU air cooler or AIO liquid cooler for improved cooling performance.
Manage Performance settings: Configure your PC settings to optimize your gaming experience. Adjust game settings such as texture quality, resolution, and V-Sync based on your PC's capabilities.
Overclocking: Experiment with overclocking to boost the performance of your CPU and GPU. Monitor temperatures and avoid overheating by setting appropriate limits.
Let It Grow: Planning for Future Upgrades
Projecting ahead makes upgrades a breeze in the future. Here are a few things to consider:
Future-Proofing: When purchasing components, opt for those with upgrade paths in mind. For instance, a motherboard with extra slots for RAM or GPUs makes for easy upgrades later.
Monitor Components: Over time, new and better components will emerge on the market. Be ready to replace outdated components with their higher-end counterparts.
Power Supply Coordination: Ensure your PSU can handle additional components and their power requirements. Use a PSU calculator to determine the necessary wattage for your build.
Troubleshooting Common Issues
While building your gaming PC, you may encounter issues along the way. Here's how to troubleshoot them:
- Boot problems: Formatting the hard drive, resetting the CMOS, and replacing faulty components can help resolve boot problems.
- Performance issues: Check for outdated drivers, running unneeded background applications, or insufficient RAM allocations.
- Game crashes: Experiment with lowered graphics settings, checking for driver updates, or switching from V-Sync to G-Sync or FreeSync, depending on your graphics card.
- TCP/IP and network connection problems: Run a network troubleshoot or contact your Internet Service Provider (ISP). If a third-party antivirus or security software is the culprit, consider disabling it temporarily.
- Hardware-related issues: Swap or replace any faulty components such as RAM, storage drives, or the PSU when necessary.
Now keep your gaming rig running smoothly with regular maintenance and software updates. With these tips, you're well on your way to building the ultimate gaming setup! No more bathroom gaming or poor performance—it's time to take your gaming experience to the next level with your new custom gaming PC. Happy building and gaming!
Enrichment Data:
- Essential Tools for Building a Gaming PC:
- Screwdrivers (Phillips #2): For assembling components and securing screws in the case, motherboard, and power supply[3][4].
- Anti-Static Wrist Strap: Protects sensitive electronics from static electricity discharge[4].
- Thermal Paste: Ensures efficient heat transfer between the CPU and its cooler[4].
- Flashlight or Headlamp: Helps illuminate the interior of the case for easier assembly and cable management[3].
- Zip Ties or Velcro Straps: For organizing and securing cables inside the case[3].
- Small Containers or Magnetic Tray: For keeping screws and small parts organized[3].
- Multimeter (optional): Useful for troubleshooting power issues, though not strictly necessary for most builds[3].
- Scissors or Wire Cutters: For trimming zip ties and cutting packaging[3].
- Tools for Other Nice-to-Have Features:
- Pliers: For bending or removing stubborn parts if required.
- Tweezers: For handling small screws or connectors.
- Anti-Static Mat: Provides an additional layer of protection for sensitive components.
- Workspace Requirements:
- Clean, Flat Surface: Provides enough space to lay out all components and prevent dust from entering the case[4].
- Good Lighting: Ensures you can see every detail while assembling components[4].
- Power Outlet: For testing the system before closing the case.
- Comfortable Seating: Reduces fatigue during long build sessions.
- Cups or Bowls: To hold screws and small parts, preventing loss[3].
- Static-Free Environment: Minimizes risk of damaging sensitive electronics (use anti-static wrist strap and mat)[4].
- Essential PC Components:
- CPU: Central Processing Unit—brain of the computer.
- Motherboard: Main circuit board for all components.
- RAM: Temporary memory for running applications.
- GPU: Graphics Processing Unit—handles video output for games.
- Storage: SSD/HDD for storing files and games.
- Power Supply: Delivers power to all components.
- Case: Houses and protects all components.
- To ensure a smooth gaming experience, consider reading reviews of gadgets like gaming mice, keyboards, and headsets that can enhance your PC setup's performance.
- As you dive into the world of custom gaming PCs, keep technology advancements in mind. Be prepared to incorporate emerging hardware trends, like RGB lighting, Virtual Reality, and high-speed SSDs, into your ultimate gaming setup.


